To begin today:
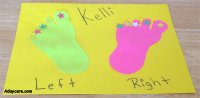
Teacher will read the "Foot Book" story to the children and after the story teacher will have all the children remove their socks and shoes and she will trace around each of the children’s feet- make sure you trace around both the right and left foot and try to go in between their toes while you are tracing their feet with a pencil. Trace around their feet onto heavy paper such as white cardstock paper and then have the children color or paint their feet and then they can decorate their feet (tracings) by placing star stickers onto their toes on their papers that they just colored, if they paint their toes, then they will need to wait for the paint to dry before sticking on the star stickers.
When they are done coloring their feet pictures, have the children cut out both of their feet and glue these onto a piece of construction paper and under the left foot teacher will write "Left", and under the right foot teacher will write "Right".
Have the children sing the Hokey Pokey Song with you, to help the children learn their left and right, have them sing the song below and have them move their left or right foot as they sing the song below.
Hokey Pokey Song
You put your right foot in,
You put your right foot out;
You put your right foot in,
And you shake it all about.
You do the Hokey-Pokey,
And you turn yourself around.
That's what it's all about!
You put your left foot in,
You put your left foot out;
You put your left foot in,
And you shake it all about.
You do the Hokey-Pokey,
And you turn yourself around.
That's what it's all about!
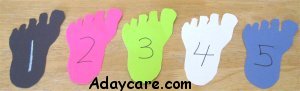
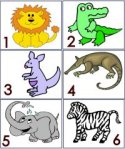
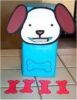
Then teacher will trace the left foot of each child onto colored cardstock paper and teacher will cut these out, write each child's name onto the back side of each foot and write a number onto the front of each foot 1 – 5.
Begin by holding up one of the feet and have the children guess who’s foot your holding up, and then put the children into small groups and give them five of the foot prints with the numbers 1 – 5 written on them, have the children take turns putting the feet in order, have the children in the group help each other to put the feet in the correct order, have a race and see which group can put the feet into the correct order first.
Song/Rhyme:
Did Horton Hear A Who? – Song
Tune to "Old McDonald Had A Farm"
Did Horton hear a duck, ei, ei, o ei, ei, o ei, ei, o
Did Horton hear a duck? Quack, quack.
Repeat with cat (meow), dog (bark), sheep (baa), cow (moo), pig (oink), horse (neigh), Did Horton hear a who, (yes, yes)
Hold up a toy animal or stuffed animal of each of the animals listed above as you sing the song about that animal and make the animal sound.
Directions: Read the children the story "Horton Hears A Who" and then have them make an elephant puppet and then sing the song above holding up their elephant puppet each time they sing the name Horton. (Teacher will point at her elephant puppet each time she sings Horton)
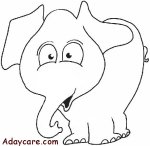
Teacher will need to print out the elephant puppets, there are two on a page, have the children color the elephants and then tape them to a jumbo craft stick to make an elephant puppet.
After the song print out the large elephant picture and have the children color the elephant.
Art Time:
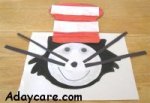
Cat Wearing A Hat
Read the children the story "Cat In The Hat"
Print out the large cat face shape and the large hat shape, and the round circle (cats face) onto white heavy paper such as cardstock paper. Use these three shapes as a pattern and cut out each child one cat face shape, one hat shape and one circle from white cardstock or white construction paper.
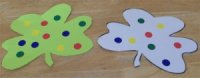
Have the children paint the cat's face shape black and then have the children paint the cats hat red and then set these aside to dry.
While their pictures are drying have the children make their cats face by using the white round circle have the children glue on two google eyes, a small round circle of black paper for a nose and 4 long skinny strips of black paper for whiskers or you can have them use four black chenille sticks for whiskers and then after their black cats face dries have them glue the white cat circle face right onto the center of the black cat's face to make the cat's face, then have them cut out two strips of white paper and glue them to the hat to make the cats hat look like the hat in the story and then have them glue the hat onto the cat to make a cat wearing a hat. Tell the children this cat is wearing a hat too, just like the cat in the story that they just heard read!
Learning Time:
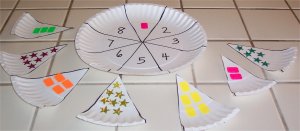
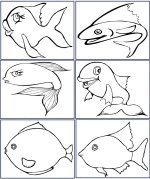
Sort The Fish
Read the children the story "One Fish, Two Fish, Red Fish, Blue Fish"
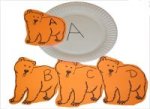
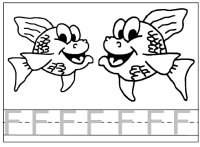
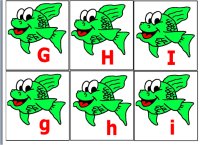
Teacher will need to print out the fish cards (black and white fish, six on the page), print these onto different colors of cardstock paper, such as red, blue, yellow and white cardstock paper.
You will need four paper plates and three sheets of cardstock paper, the same colors that you used for the fish and cut out a red, blue and yellow circle from the cardstock paper, you can use the circle from the cat in the hat art time (as a pattern) to cut out the circles that you need.
Tape or glue one of each colored circle (red, yellow and blue) to each one of the paper plates, one paper plate will not have a circle taped to it as it is already white (unless your using colored paper plates then you would need a white circle) and the children will match up their fish by color the paper plates.
Cut the cards apart and place into a small cloth bag or a small pillowcase, have the children take turns picking one card from the bag, have them hold up the fish and tell you what color fish they caught from the bag. Have the children match up the fish to the matching colors on the paper plates and place the fish onto correctly colored paper plate .
Learning Time:
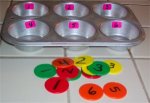
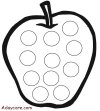
Apple Circle Game
Read the children the story "10 Apples Up On Top"
You will need: White cardstock paper, apple file with circles on it, circle stickers and die.
Optional two milk cartons (cardboard ones)
Directions: Print out the apple file with the circles on the apple, you will need one apple print out per child. You will need a jumbo die or you can make the die.
To make the die: you will need two cardboard type milk cartons, cut the cartons in half, and discard the tops (the part you pour from) from both cartons, then push the two cards together, open ends together, push in firmly, cut out some squares the same size as the milk carton and glue on one square to each side, write one number onto each square 1 – 6
Math Game: After the story have the children play a fun math game. They will take turns shaking the die and whatever number they shake is the amount of circle stickers that they will put on their apple, teacher will help them count out the circle stickers (if they need help) and then they will stick the circle stickers onto the small circles on their apple. The first child to fill their apple wins!
You should be able to find circle stickers in Wal-Mart in the office section or any office supply store.
Special Activity:
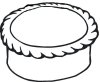
A Green Birthday Cake
Read the story "Green Eggs and Ham" to the children.
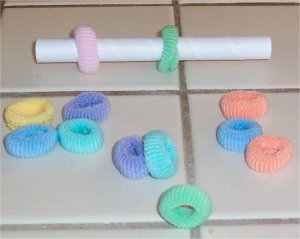
Then provide the children with some green play dough, rolling pins, small toy pans, small baking sheets, and small sturdy spatulas, pretend candles (wooden craft sticks or old fashioned clothespins – no springs.
Have the children pretend to make a green birthday cake, stick in pretend candles and sing happy birthday to Dr. Seuss.
They can also pretend to make green eggs by using a yogurt cup to make circles in the play dough after the roll out the dough.
Print out each child one birthday cake print out onto copy paper, have them color the cake and then teacher can cut out some rectangles (candles) from different colors of construction paper and give each of the children a few of the different colored rectangles to glue onto their birthday cakes.
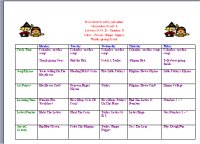
Download Lesson Plans & Printable Pages
Make sure you download both files below, to receive both the lesson plans – shown above – plus the printable pages – that goes along with the days activities, you will also find a calender for the one day of activities and a poster to display for the Dr. Seuss one day theme.
 Free Sample – One Day Lesson Plans – Dr. Seuss Theme
<--Right mouse click the file – do a "save as" to your computer to save the file to use later.
Free Sample – One Day Lesson Plans – Dr. Seuss Theme
<--Right mouse click the file – do a "save as" to your computer to save the file to use later.
 Free Sample – Printable Activity Pages For – Dr. Seuss Theme – One Day Lessons Plans (above)
<--Right mouse click the file – do a "save as" to your computer to save the file to use later.
Free Sample – Printable Activity Pages For – Dr. Seuss Theme – One Day Lessons Plans (above)
<--Right mouse click the file – do a "save as" to your computer to save the file to use later.


 Contact Me